Step 1: Assembly of motor and magnet hub
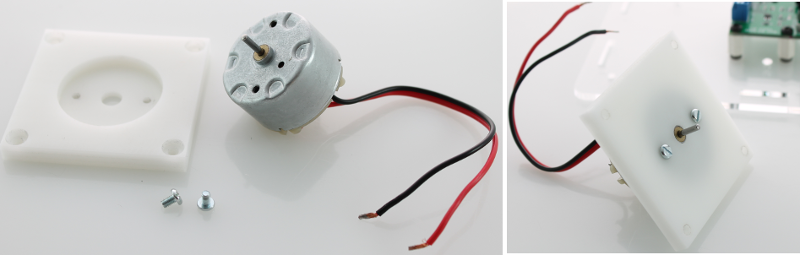
Motor mount assembly
Parts: 3V motor, motor mount, 2 x motor screws
Mount the motor onto the motor mount using the two motor screws as shown in the image below. Note: use the 2.5 mm blade side of the screwdriver here.
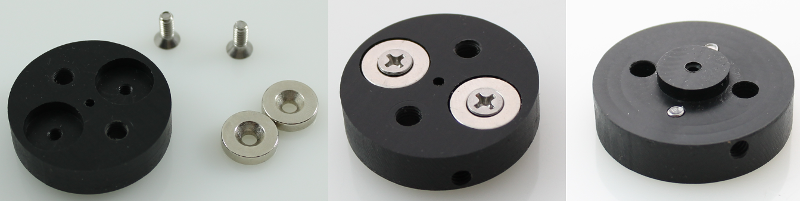
Magnet hub assembly
Parts: magnet hub, 2 x magnets, 2 x magnet screws
Secure the two magnets into the magnet hub positions using the magnets screws and Philips side of the screw driver. Use caution during this step as the neodymium magents are very strong and if they are allowed to slam together too hard they can break.
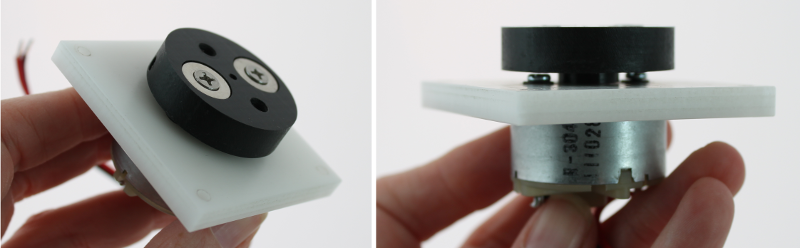
Mounting magnet hub onto motor
Parts: assembled motor mount and magnet hubs, set screw, L-shaped wrench
Once you have the magnet hub assembled, place it onto the motor shaft. Important Step: Make sure to leave a small gap between the bottom of the magnet hub and the motor mount so that the two parts do not rub against each other when the motor is turning. Take the set screw and screw it into the side of the magnet hub. This will secure the hub onto the motor shaft.